

Lots of birthdays in October in our family...I thought I would make a pumpkin patch instead of a birthday cake. The pumpkins are cake pops placed on top of rice krispie bars and cupcakes... I thought the krispie bars would look like bales of hay and the stems are made out of Tootsie Rolls... Decorate with green buttercream icing and you have a really cute treat for that special birthday or Halloween party.
Autumn Rice Krispie Treats
Let's start with the Rice Krispie Treats. I'm sure you have the recipe already, but if you don't you can print the one below.


Krispie Bars Ingredients:
3 T. butter
1 package (10 oz., about 40) Marshmallows
or 4 C. Miniature Marshmallows
6 C. Kellogg's Rice Krispies
Instructions:
- In large saucepan melt butter over low heat. Add marshmallows and stir until completely melted. Remove from heat.
- Add KELLOGG'S RICE KRISPIES cereal. Stir until well coated.
- Using buttered spatula or wax paper evenly press mixture into 13 x 9 x 2-inch pan coated with cooking spray. Cool. Cut into 2-inch squares. Best if served the same day.
MICROWAVE DIRECTIONS:
In microwave-safe bowl heat butter and marshmallows on HIGH for 3 minutes, stirring after 2 minutes. Stir until smooth. Follow steps 2 and 3 above. Microwave cooking times may vary.
Note:
- For best results, use fresh marshmallows.
- 1 jar (7 oz.) marshmallow crème can be substituted for marshmallows.
- Diet, reduced calorie or tub margarine is not recommended.
- Store no more than two days at room temperature in airtight container.
To freeze, place in layers separated by wax paper in airtight container. Freeze for up to 6 weeks. Let stand at room temperature for 15 minutes before serving.
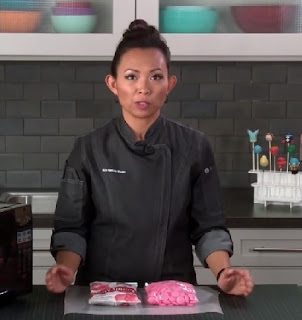
Now for the pumpkin cake bonbons...
I have a few videos showing how to make your cake balls. This method is the best that I have found. I was always having issues with making my cake balls for cake pops. Either they were too wet, or too dry or they leaked through the candy melts. I found this gal's youtube video and it made all the difference in the world. She doesn't use any oil when making her cakes that will be made into the cake balls. It was the best information I could have got. She also has lots of other videos regarding cake pops or cookies or other baked goods. You might want to check her out. Her videos are so good. Below is her video on makings the cake pop balls. You can find her website for other delectables here.


Issues with Dipping Cake Pops
I was also having issues with the candy melts. When I first started making cake balls, I used a melting pot and added shortening to the melting wafers when it wouldn't thin out. I watched this gal and found that it's so much better melting the wafers in the microwave and by adding "Paramount Crystals" instead of shortening to thin the melting wafers. This video taught me how easy it really is.
I also had some issues with cracking. To be quite truthful you can't save them all. It all depends on the coolness of the cake balls, or the heat of the wafers, or both. The weather also plays in cracking. So if you have a few that crack, it's not a big deal. Anyway, it's worth it for you to watch this video on dipping cake pops if you are having the same issues. I learned a lot!
How to Make Pumpkin Lines on Cake Pops
Here is a video showing how to make pumpkin cake pops with lines in the pumpkins. This makes those cake pops look a whole lot more like a pumpkin.

Pumpkin Cake Pops

Ingredients:
- 1 cake mix of your choice
- *Note: Do not add the oil to the cake mix. Just eliminate it. Please check out the video above showing you how your finished cake crumbs should look.
- 1 can white or cream cheese cake frosting, or you can use your favorite frosting. You will only need about a 1/3 cup.
- 1-2 packages of candy melts, I used orange for the pumpkins
- 1 small bag of Tootsie Rolls (for stems)
Instructions:
- Bake the cake according to package instructions, excluding any oil ingredient. Let the cake come to room temperature after baking.
- Break the cake up in a large bowl until fine crumbs.
- Start adding cake frosting a little at a time. I started with 1/3 cup and added a little more to make sure the cake crumbs stayed together. You don't want the crumbs dry, but you don't want them too wet either. You'll know by the way they feel. Check the video out in my post. She explains how they should look and feel.
- Take an small ice cream scoop or about 2 tablespoon of the cake crumbs and form them into firm balls. Take a teaspoon and make indents on the cake balls to create the pumpkin look. Then put a stick in each ball so it's easier to dip in the candy melts. Don't put them in too far, as it will be to hard to remove them after they are dipped. Place them on a cookie sheet, cover and freeze for about a half hour.
- In the mean time start melting your candy melts according to package instructions.
- Remove from freezer and work in small batches, as the cake balls will become too soft if you leave them out too long. Put the ones you are not working with in the refrigerator until you need more to dip. Note: I wipe off my cake pops to get rid of any moisture or crumbs that might fall into the candy melts.
- To make the lines on the pumpkins, take a cake pop stick and draw the lines on the cake ball before dipping.
- Have another cookie sheet ready to go for placing the dipped cake pops on to set. Cover the cookie sheet with either aluminum foil or wax paper so they don't stick.
- Cut the tootsie rolls into small pieces and form them into a stem. Once you remove the stick, dip the tootsie roll pieces into a little of the candy melt and put the stem in the hole that was created by the stick.
- If you want, at this point you can add leaves or decorations with other candy melts or buttercream frosting.
NOTE:
If you don't want to go through the process of making the pumpkin cake pops, you can always use the candy pumpkins that can be purchased at any big box store. Then make some buttercream icing to make the leaves and grass.

Buttercream Frosting Recipe...
Buttercream frosting is made to be used with decorating tips. It's consistency is medium, but not stiff. This frosting needs to be covered between uses so it doesn't dry out. The frosting will set up at a medium pace. This frosting is used to also decorate cakes, cookie and other bakery confections.

Buttercream Frosting

Ingredients:
- 4 C. powdered sugar
- 1/2 C. stick margarine or butter
- 1/2 C. Crisco shortening
- 1 tsp. clear extract of your choice
- 1 T.- 5 T. milk
Directions:
- Place butter or margarine and Crisco shortening in a mixing bowl with a paddle attachment and mix until light in color.
- Add powdered sugar one cup at a time.
- Add milk 1 T. at a time until you have reached the desired consistency. Start with one tablespoon and add additional tablespoons as needed. Remember you can always add milk, but you can't take it away if the frosting becomes to thin.
- Add clear extract of your choice and beat until you have the consistency of a thick whipped cream. It should be flexible, not stiff.
One Last Thought...
Well, so much for pumpkin cake bonbons or pops and krispie bars. I sure hope you enjoyed this little Halloween or autumn post. Apart these treats are really good, but put them together and you have a really cute and yummy Halloween or birthday party treat! Enjoy!


20250521_14272367.jpg)


Always remember...Life is short, eat dessert first!"...Words to live by!

No comments:
Post a Comment